Dream Engraving Project: Wedding Details
When I received a message asking if I could engrave a set of perfumes and champagne flutes, my heart jumped for joy! This is the ideal client with a dream request for me! I was so excited! I sent her to my website contact form, got her quote sent out, and answered her questions. We were a go to begin the project!

We scheduled a meetup to get the items to be engraved and I got to work on the mockups. The bride knew what she wanted it was a matter of seeing what it could look like in my style. I offer my clients a few options to choose from in terms of layout, design, and script mixes based on the inspiration. My client loved them and we settled on the final designs. Next step: drafting.
What you may not know, is for specific commissions like this, I don’t typically freehand my work on the piece. I opt for transfer paper and print out my mockups to scale. This is a bit tricky and requires some measuring on the computer to get the actual mockup printout as close to scale as the mockups showed digitally. Sometimes it involves fighting with my printer, but I make it work. Each mockup is cut to size for the piece and taped on to trace. For the perfumes, this is a really simple process! Simply line up the printed perfume with the real deal and seal the tape on. Easy peasy. Champagne flutes are a different kind of challenge.

Obviously, there’s the curvature of the glass to take into account, but tracing it on with transfer paper has more likelihood of breaking. I trace a bit heavy-handed and do not want to risk breaking these beautiful champagne flutes due to the weight of my hands. Therefore, I opt to put the cutout inside the glasses. Easy enough, right? Insert and trace. Wrong. This is where the glass distortion comes into play. if the paper is inserted straight into the widest point of the glass without curving, the glass can still distort the image. It also takes a good deal of alignment to get the verbiage centered both up and down and side to side on a particular plane of the glass without slanting. Now that one is perfectly placed, I take my fine-line Sharpie and trace a line with my ruler to serve as the baseline and keep it aligned vertically. This helps keep my eyes on the target line while I trace. The slightest movement can cause the words to be altered off the baseline and can lead to slants. Viola! We have one drafted champagne flute. If that wasn’t delicate enough, replicate it identically on the second and go! That took much more time. Perfecting the placement once and replicating it is very challenging. It took quite some time and redrafting, but I managed to get it as close as possible!

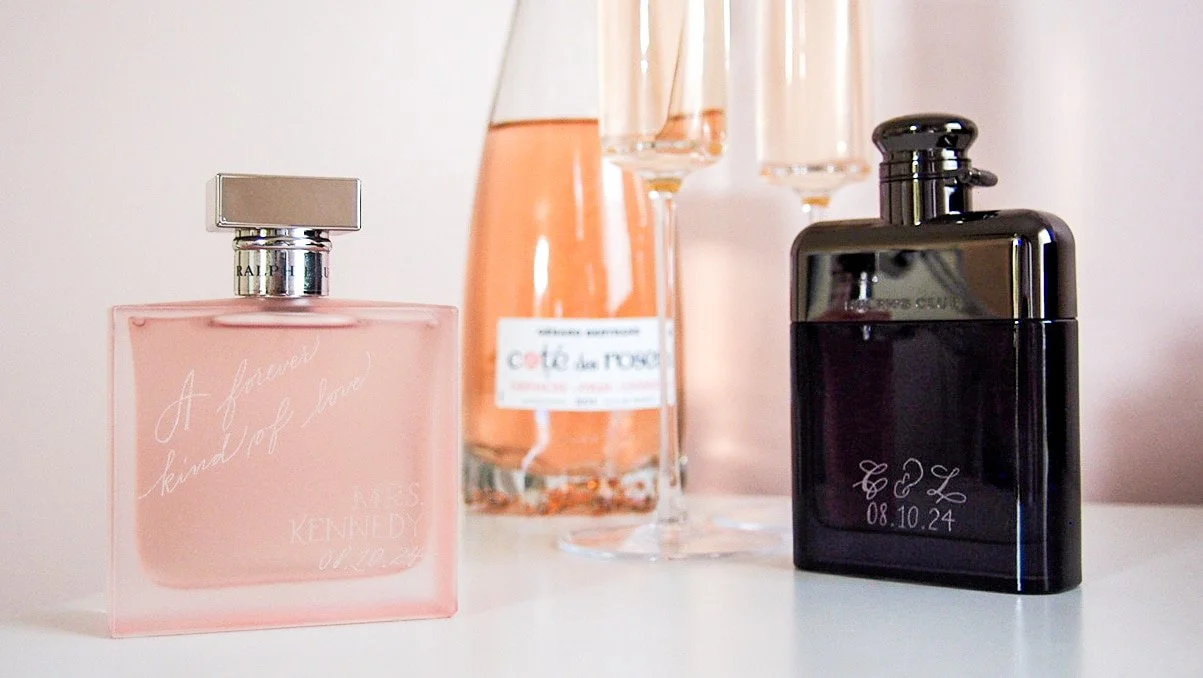
Next up, the actual engraving! I did the groom’s fragrance first since that was the easiest piece. It was the shortest to write and engrave and only took about 5 minutes of engraving to get it done. Next up is the bride’s fragrance. This one was quite the endeavor. The bride wanted a mix of script and serifs. If you know fonts, you know serifs have clean lines, are very straight and even, and have the cutest little feet on the letters. As I am a hand engraver, this is a challenge. I have to work slower than usual and keep a very steady hand to make these lines straight. Once the block serifs were done, it was time to move on to the script. The script is actually much easier to engrave! There is a little more room for error and those “errors” can be course-corrected as you go. Of course, large mistakes will be noticeable and cannot go back, this is engraving glass after all. My script of choice is Spencerian, my current favorite! It’s a monoline script that feels more elevated than American Cursive and can have much fancier uppercase letters. We chose a simple A that aligns best with her inspiration.
Next up was engraving the champagne flutes. Now I was genuinely scared to engrave these. Many people get champagne flutes engraved on the base of the glass where its flat and easy to write on. However, many calligraphers have engraved champagne flutes and I practice light-handed engraving, I assured myself I’d do fine. I tested on some pasta jars and examined the depth of glass etched using the bur of choice and you know what happened? It was barely etched yet had perfect visibility! That eased my worries so much that I dove headfirst into the first flute. I placed the glass perfectly on the pillow for support and stability and got to work. All went well and smoothly! Second flute, no issues! I was worried for nothing! Each of these flutes probably took about 12 minutes to engrave. I worked a bit slower than usual, even though it was a script, to ensure light-handed delicate strokes, not digging my bur into the glass, and using a slower RPM than I typically use on glass to ensure the vibrations of the glass wouldn’t affect its structure. I was thrilled with the results!
Once the pieces were done, I had to have a photoshoot for this dream project! And I loved them so much, that I’m incorporating these into my branding shoot photos! They turned out SO GOOD! And you know what’s better than loving my work? My CLIENT loving my work! It’s the best feeling knowing that all the hard work paid off for their reaction! These pieces were delivered to the bride in time for their wedding! I hope you love these as much as I do!